Tuesday, December 8, 2009
Sunday, November 1, 2009
WANTED!! Dangerous fugitive!
ATTENTION : We are looking for this dangerous lawbreaking fugitive!
Have you seen this cat?
WANTED!
Name - Stella
DOB - 6/16/04
Height - 15 inch
Weight - 8.2 lbs
Weight - 8.2 lbs
a.k.a - Stella Bean, Bean, Nella, Nell, Nellevator, Nelly Belly
Known to have many aliases.
Known to have many aliases.
Wanted for brutally attacking (on several occasions) this crow.
A witness reported seeing a medium haired tabby fleeing from the scene of the latest atack, leaving the victim badly injured. The victim lost an eye in earlier attacks and several tail feathers in the most recent attack.
If you see this fugitive, call police immediately. Do not approach this fugitive, as she is known to be armed and dangerous....oh yes, and naughty. If I didn't adore her so much, she would be in a heap of trouble.
Blessings, Tracy
Labels:
Bad Cat
,
Cats
,
Crow with Eye Patch
,
Crows
,
Halloween
,
Halloween Decor
,
Stella
Assorted Halloween Candles and Votives
Labels:
Halloween
,
Halloween Decor
,
Pumpkins
,
Spiders
,
Votives
Somebody up there doesn't like me!
Today, I sadly started taking down and packing away our Halloween decor. While taking a little break, I saw my darn broken down camera sitting on the counter....taunting me (I say). I picked it up, turned it on and found it was "kind of" working again. It was having brief breakdowns still, but I was able to snap a few pictures. I am annoyed that I missed so many photos in the last 2 days and now that I have packed away or dismantled about a 1/2 of our Halloween decor, it decides to work again. Here is a few of the pictures I was able to snap between breakdowns.
Tall jar of bones.
You can buy these jars really cheap at Marshalls & TJ Max.
Short jar of skulls
Our Guest Bath
Close up of framed quote in bath.
This quote is from the Metallica song, Enter Sandman. Not a Metallica fan, but thought this quote was priceless for Halloween. It took me 10-15 minutes to put together - Printed out quote, burned edges of the paper and backed with a piece of black construction paper, framed in a Goodwill $1.99 frame. I would have liked to age the paper, but this was done just before my dinner guest arrived. Our guests really got a kick out of it.
Guest bath 2
Missing a shot of framed vintage (creepy) photo that I had already packed. It was sitting next to this folk art skeleton figurine, in our guest bath.
Living room skulls
Living room - skull in a basket
Skull & owl on top of Fridge
Bat silhouette hanging in spare bedroom window (shot from inside).
See this post for a brief "How To" on making these silhouettes.
Man silhouette hanging in guest bedroom (again shot from inside).
Missing our last silhouette. I already removed and stored our "Witch and Caldron" silhouettes that hang in a double window in our master bedroom. Maybe I'll get a shot next year.
Bought these 3 vintage ghost figures at an Estate Sale.
Two (of many) lit pumpkins
Owl hanging out on a curtain rod in dining room
Pumpkin figurine.
Vintage looking treat bucket
Halloween Cake Server
Cake server with skull and mouse.
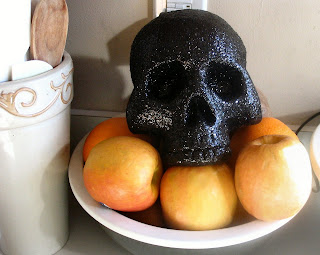
Skull in fruit dish
Living room table skull
Crow (with pearls) on mantel
Owl on antique mantel clock
Mesh covered pumpkins
Large owl on top of kitchen cupboards
Crow and twig pumpkins on top of kitchen cupboards
Crows, twig pumpkins and flying pig....oh my!
On top of kitchen cabinet. Fall colored dishes.
I wanted to get some update porch and outdoor decor pictures this year, but sadly we already packed it up late last night.
If I find other things as I pack I will try to snap some additional photos.
Blessings, Tracy
Labels:
Bats
,
Crows
,
Halloween
,
Halloween Decor
,
Halloween Ideas
,
Halloween Projects
,
Halloween Silhouettes
,
Halloween Window Ideas
,
Pumpkins
,
Quote
,
Skulls
,
Window Silhouette
,
Zombie
Thursday, October 29, 2009
UH...OH!! Houston, we have a problem!
My frickin' camera died! I guess that's what I get for talking trash about it a few posts back. I won't have time to buy a new one before Halloween, so I think that's it for pictures for this year. I was hoping to finish setting up the rest of our Halloween decor tomorrow and take pictures on Saturday. I know....I am so behind this year! I planned on posting a final Halloween picture blitz on Saturday or Sunday. I'm so disappointed!
Behold, the last 3 pictures it took during it's final gasps for air. The last one is kind of creepy looking!
Behold, the last 3 pictures it took during it's final gasps for air. The last one is kind of creepy looking!
Well, (with my head hung low and swear words possibly slipping out of my mouth) I'm off to make my second cheesecake of the day. We have 15 people coming over for a big Halloween dinner tomorrow night. WHY..OH...WHY couldn't it hold on just 2-3 more days!!!
Blessings, Tracy
Labels:
Halloween
,
Halloween Decor
,
Halloween Ideas
,
Halloween Projects
Wednesday, October 28, 2009
Ahh....it's going to be a beautiful day!
Wow, with a sunrise like this, how could this day go wrong!
This picture was taken from our screened in porch this morning. I'm sure it would have been better, if I hadn't been too lazy to actually walk out on to the deck to take it. Nope, this gal just shot the picture right through the screen. I know....pitiful.
It really was so beautiful!
Blessings, Tracy
Tuesday, October 27, 2009
Is it Halloween yet?!
Labels:
Halloween
,
Halloween Decor
,
Halloween Ideas
,
Halloween Projects
,
Skulls
Monday, October 26, 2009
When Pigs Fly...Halloween style!
This guy sits on top of our kitchen cabinets all year round. I just love him. I thought he would like to join in on our Halloween fun, so I made him a little glitter mask for the occasion. I think he turned out cute!
OK then, I'm off to put him back up on his perch.
Blessings, Tracy
Labels:
Flying Pig
,
Halloween Decor
,
Halloween Ideas
,
Halloween Projects
Sunday, October 25, 2009
Oh no! I have "BATS IN MY BELFRY"....Umm, I mean foyer!
We have around 50 bats spinning in our foyer during Halloween. When it comes time for Trick or Treaters, we dim the lights and it looks really spooky, with all the bats gently swaying and spinning. When the neighborhood kids come to the door and look up to say their "Trick or Treats", all they see is tons of bats floating over our heads. It's really fun to see some of them simply become speechless (not is a scared way, of course). They just stare without saying a word until we snap them out of it by saying, "Happy Halloween". ;-)
This picture shows just a few of our bats, with the rest spinning over my head and behind me, while I snapped this shot. Sorry...it's nearly impossible to get a good shot of these little devils.
Blessings, Tracy
Labels:
Bat Silhouettes
,
Bats
,
Halloween
,
Halloween Decor
,
Halloween Ideas
,
Halloween Projects
,
Herman Munster
Friday, October 23, 2009
Tuesday, October 20, 2009
Grave stones
Like most of our Halloween decorations, we made these several years ago. I found the idea and directions in this book - Halloween Crafts: Eerily Elegant Decor" by Kasey Roger (who played Louise Tate on Bewitched) and Mark Wood. I thought most of the projects in this book were just OK, but it did have a few good ideas.
We are reworking the above gravestone, since it has the most damage of the three.
These gravestones are pretty big in general. They all measure around 3 1/2 feet tall x 2 feet wide x 5 inches deep.
Here's how we did it -
Here's how we did it -
- We sandwiched and glued 2 pieces of construction foam/sheet insulation together. Before applying the glue, make sure to carve 2 'rebar" channels on the insides of foam (sides that will be glued together). This will be used later for display purposes.
- Carve your design into the headstones. For the second gravestone, we added a carved (skull shaped) piece of foam to the front; for added dimension.
- Cover foam with a heavy layer of paper mache.
- Once this dried thoroughly, we spray painted over the paper mache with stone/granite textured spray paint. Once this dries, we distressed the gravestones with watered down black and eerie green paints.
- Once this dried, we sealed the crap out of them.
- Using hot glue gun, glue moss on to areas of the front of gravestone to add an aged look.
- To display, we pushed 2 short pieces of of rebar in the ground and slid the gravestones on to these.
These gravestones have held up really well until about 2 years ago. At that time, they sat outside for 2 days in torrential rain which was then followed by a hard freeze. They just couldn't take it & the backs cracked open. We still use them, but they just look really bad from the back. This year we are going to try and redo one of these, using a different method. If it works out, we will redo the others next year. Keep your fingers crossed.....
You can also see a picture of one of our headstones in the Mr. Bones entry.
Blessings, Tracy
Labels:
Books
,
Grave Stones
,
Halloween
,
Halloween Decor
,
Halloween Ideas
,
Halloween Projects
Subscribe to:
Comments
(
Atom
)


